Learning Community > Acclimating New Fishes to Their New Homes
The Right Way to Welcome New Swimmers: How long should I wait before adding fish to a new tank?
Bringing home new fish is always exciting—it’s like adding new stars to your underwater world. But before you pop open the bag and let them dive in, let’s press pause for a moment.
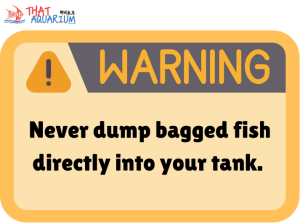
Dumping bagged fish directly into your tank might seem like the fastest way, but it’s actually the riskiest—for two big reasons:
Disease Transmission
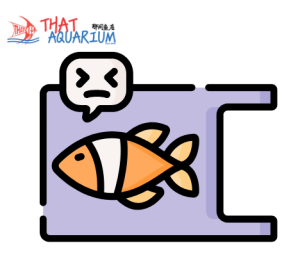
The water in the bag might carry unwanted hitchhikers—like parasites or bacteria—that you don’t want in your tank.
Stress from Sudden Change
Temperature, pH, and transport stress can shock your fish, weaken their immune system, and cause long-term health issues.
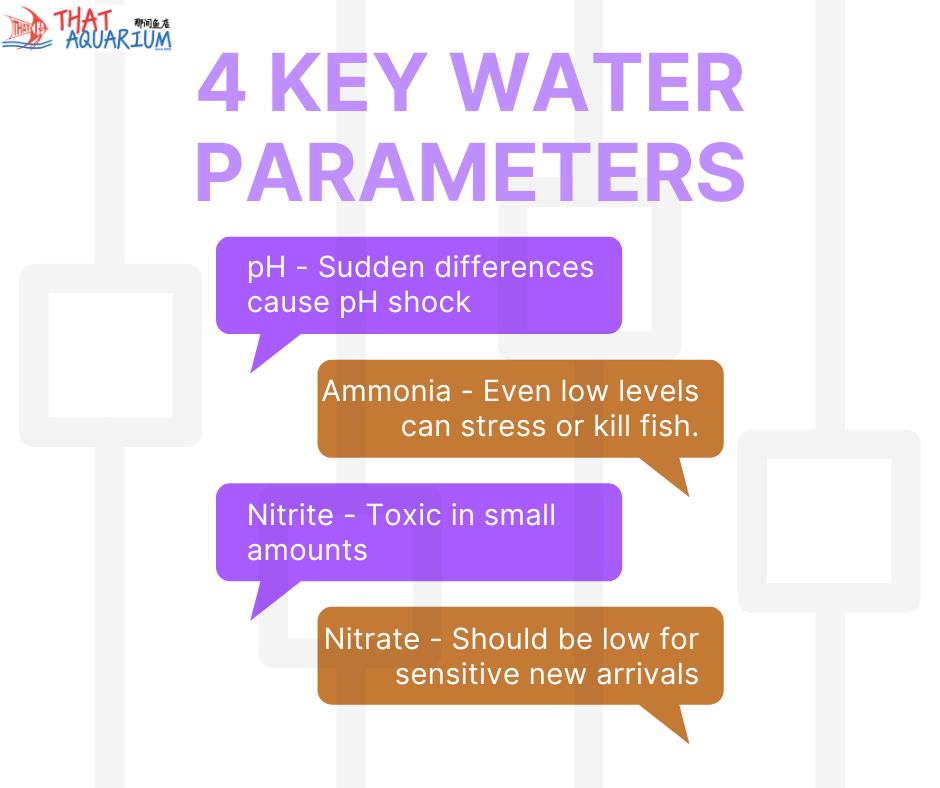
Always check the following parameters before adding new fish:
🧪 No test kit? No problem—bring 150ml of your water to our store, and we’ll test it for you free of charge.
💬 If you’re purchasing fish from our store, feel free to ask our staff for the pH of our tanks—we’re happy to share it to help you adjust your acclimation process.
Pro Tip: Not sure what your tank pH is? Ask our staff what the pH is in our fish holding tanks—we’re happy to share this info to help you acclimate your fish properly.
Before starting the acclimation process, perform a 30% water change. This helps to:
CO₂ injection acidifies water, lowering the pH. If you’re introducing new fish right after a CO₂ dose, the drop in pH might shock or stress them.
Here’s what to do:
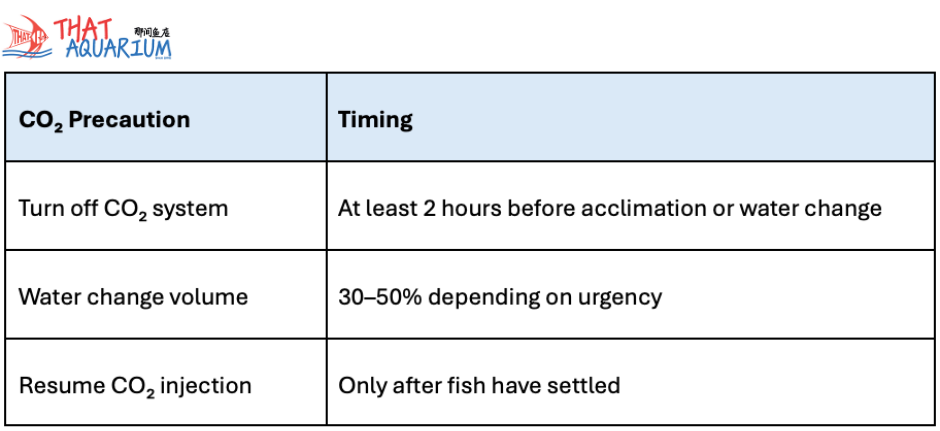
⚠️ Sudden exposure to acidic water can prevent fish from adapting properly—even if your other parameters are perfect.
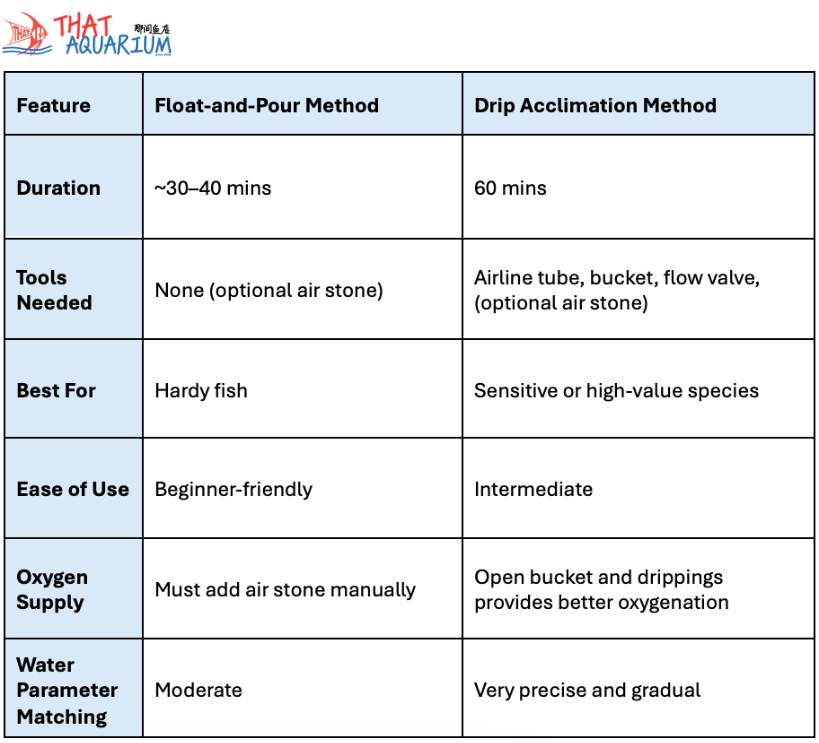
Here’s the safe and stress-free way to acclimate your fish:
Float the sealed bag in your aquarium for 30 minutes to match the water temperature.
🧠 Note: In tropical climates like Singapore, temperature differences are often minimal—but if your room is air-conditioned, don’t skip this step. A few degrees can make a big difference.
Every 5 minutes, add about 60 ml of tank water into the bag.
As a guide, this should be about ⅛ of the bag’s water volume (adjust if the bag is big or small).
While acclimating, it’s important to aerate the bag, especially if you have multiple fishes, or big fish or the bag was sealed for a long period.
💡 Pro Tip: Add a small airline with an air stone into the bag during acclimation to prevent oxygen depletion.
After about 20 minutes:
🛑 Avoid pouring bag water into your aquarium—it may carry contaminants, especially if the fish came from a different system or environment.
Best for sensitive, high-value, or wild-caught fish
This method gives your fish a gentle, gradual introduction to their new water—ideal for species sensitive to pH swings, TDS, or temperature changes.
1. Place the fish and bag water into a clean bucket (not directly into your tank)
2. Secure one end of the airline tubing to your tank—ensure it stays submerged
3. Suck on the other end of the tubing to start a siphon, then place it into the bucket
4. Adjust the valve or knot the tubing to drip water at 1–2 drops per second
5. Allow water to drip for 60 minutes, until the volume in the bucket doubles
If the pail starts to overflow during the process, simply scoop out some water to make space—without interrupting the drip.
6. Gently net the fish out of the bucket and place them into your tank
7. Discard the bucket water—do not add it to your aquarium. Observe the livestock to ensure they are not showing signs of stress or unusual behavior.
💡 Pro Tip: For high-value species like Discus, Arowana, or wild-caught Tetras, this method significantly reduces shock and improves survival.
💡 Pro Tip: For larger fish or multiple fish, always add an air stone into the bucket or pail during acclimation to maintain adequate oxygen levels throughout the process.
Whenever possible, use a quarantine tank—a separate, smaller tank to observe new fish for 7–14 days before adding them to your main display.

🧠 Pro Tip: Even a basic tank with a sponge filter, heater, and hiding spots will do the job.
Once your new fish are in their tank:
Not sure which method suits your fish best? Need help setting up your first drip acclimation? Just swing by our store or send us a video of your setup—we’ll walk you through it and ensure your new fish have the best possible start.
👉 Next Up: Aquarium Maintenance Steps
Proudly presented by our That Aquarium Digital Team, where innovation meets aquatic excellence.
Published on 13 June 2025
Author: Kelvin Phua
Illustrator(s): Chai Minyu, Abbie Tan